Wednesday, May 28, 2014

Stuffed Potatoes


Stuffed potatoes is alwaysssss in heavy rotation in my kitchen because I usually always have the ingredients on hand and it's a snap to make! It's also super versatile! 


When I first started making these, I made them with shrimp, like I was taught by my mom but one time I didn't have shrimp, so I used chicken and haven't looked back since but you could also try broccoli or black beans for a meatless meal! The cheese used is also interchangeable I sometimes use mozzarella, cheddar or a three cheese blend and even Parmesan, it really just depends on what I have in the fridge. I don't usually serve sides with these, just two potato halves or three if I'm hungry but you definitely can add some veggies like broccoli (my fav) or a salad. Oh and did I mention it's low-calorie? AND you can control your caloric intake by omitting or using less of certain ingredients like butter and cheese. Win win!


So first, bake your potatoes, the old fashioned way in the oven OR poke some holes in them and throw them in the microwave for 5-10 minutes depending on their size. I always start with 5 minutes then do 3 minute increments until they're done.

While your potatoes are cooking, go ahead and get your meat cooked

Once your potatoes have cooked and cooled, cut them in half and start scooping the inside out, but make sure to leave a layer on the inside of the peel or it'll be too weak to hold your stuffing.


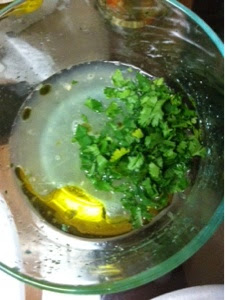
Dump all your potato filling in a bowl and mix in your cheese, butter, milk (or sour cream, which I like better) and seasoning 


Then fold your chicken into the stuffing mixture


Scoop the stuffing into your potatoes, sprinkle a little cheese on top and throw them in the oven for about 10 minutes or until the cheese melts and enjoy!


For 2 servings of two halves each I used 

1 boneless skinless chicken breast (cut into chunks)
2 potatoes (Idaho and russets are best for baked potatoes)
Cooking oil
~2-3 T butter
1/4 C sour cream (or milk)
~1/3 C cheese plus some extra for topping 
Salt and pepper or Tonys 

1. Preheat your oven to 450. Wash and prick your potatoes then microwave them  until done (5-10 minutes)

2. Heat a skillet over medium heat, add cooking oil and when hot add chicken and cook until done. 

3. When potatoes have cooled, cut in half lengthwise and scoop out potato filling, leaving a thin layer on the inside

4. Combine potato filling, butter, sour cream, cheese and chicken in a bowl and mix until butter is melted

5. Scoop stuffing into potato peels and top with cheese

6. Bake 10 minutes, uncovered or until cheese is melted and enjoy!


Hope you try it and love it! Aren't fast and easy recipes the best? =)

Friday, May 23, 2014

Easy BBQ "Pulled" Chicken


I'm always looking for ways to save money, especially on food because that's one thing I know I don't have the option not to buy. So as of late I've been raiding my freezer for any and every usable item. Last night, I stumbled upon a bag of drumsticks, which I'm sure was left by our former 'roommates' because the only chicken I buy is boneless skinless breasts and the occasional pack of wings. I'm not really a drumstick person so I decided google recipe ideas using drumsticks while they defrosted. I came across multiple posts and recipes for shredded chicken which was something I hadn't made in a while, plus it reminded me of my beloved pulled pork sandwiches so "pulled chicken" sandwiches it was!

I started by boiling the drumsticks with enough water to cover them, it took about 20 minutes.


*note: I added onions, carrots, parsley and a little salt and pepper to my water to make a nice broth that I could use for other dishes but you don't have to do that.
Once my chicken was cooked, I pulled it off the bones, burning my fingers along the way because I was too hun...impatient to wait for it to cool


Then I put the chicken back in the pot along with a little of the broth and set it on medium heat


Next I added one of my favorite BBQ sauces, Sweet Baby Ray's, a little brown sugar, dijon mustard, hot pepper sauce and Tony's....I just like to spruce stuff up but you can just use BBQ or throw your own extras in if you want.


Mixed everything up, let it heat throughout and it was good to go!


______________________________________________________________________

For 4 servings (sandwiches), I used:


chicken drumsticks
8 slices of bread
3 C water
1/2 C BBQ sauce
1-2 T dijon mustard
1 T brown sugar
1-2 T hot pepper sauce
Tony's to taste


Directions
1. Place chicken and water in pot and boil for 20 minutes or until done

2. Once cooked, set drumsticks on a plate to cool before shredding. Remove broth to store or toss and place back on stove over med heat

3. Add chicken back to pot along with BBQ sauce, mustard, sugar, seasoning and hot pepper sauce. Stir to combine and heat throughout

4. Spoon chicken on bread (toasted is best!) and enjoy. I like to add pickles to mine, delicious!

**If you're going to keep your broth, let it cool before storing in fridge or freezer.


Wednesday, May 21, 2014

Shrimp Scampi

Fail-Proof Shrimp Scampi


I know I've tried to keep it moderately healthy so far with the recipes but everyone deserves an indulgent meal every so often and this buttery, shrimpy goodness was mine for the week! I can't take credit for coming up with the recipe but I modified it for my tastes so it's kind of its own recipe. I have made this recipe many times with different brands of ingredients and additional stuff thrown in and it always comes out amazing! If you wanna google, the original recipe is called Red Lobster's shrimp scampi but my version actually tastes better than the restaurant to me.

For the most part I stick to the original recipe but I do add a few more seasonings and strictly use moscato because it's sweetness goes perfectly with the tartness of the lemon juice. But you can use any other white wine you like. I usually pair this dish with steamed broccoli and/or a salad but you can totally do garlic bread or cheddar bay biscuits (if you do the biscuits, send me the recipe!!). But anywho, on to the good stuff..
_______________________________________________________

Like my other recipes this is cooks up pretty quickly, the first thing you want to do is defrost (if you're using frozen), peel and devein
the shrimp. Then get your pasta going, when I'm in the kitchen, I
like to minimize dishes and time, so I steam my broccoli over the boiling pasta. Pasta is optional and can be omitted or substituted with your favorite rice or quinoa if you prefer.


While that's cooking go ahead and heat a skillet with a little cooking oil, toss the shrimp in and cook until pink


Set the shrimp aside and add the garlic. Cook until fragrant but don't let it burn. I sometimes add onions here too but that's only when I'm feeling fancy....or trying to get rid of onions lol


Next add dump the wine and lemon juice in and cook until the liquid is reduced by about half. I usually cook until a little more than half is left because I like my scampi saucy. I also use a whole lemon in my recipe because I love lemon, but you can use half a lemon like the original recipe.


Now you add the italian seasoning plus some pepper, garlic and onion powder because it tastes so good! Mix that up and turn the stove to low.


Next, toss that whole stick of butter into your skillet....yes, it's a lot of butter I know but believe me when I tell you it's worth it!


Let the butter melt, mingle and do it's magic. You can swirl it around a bit to speed up the process like I do.


Once it's all melted throw the shrimp back in, a little salt and let it all heat up for a minute. 


The pasta should be done by now so drain the water out of the pot and dump the scampi on top. Sprinkle some Parmesan (or not if you're still hyperventilating about the butter, it's STILL amazing) on top and feast like royalty!!!


I will say that this time I made it super saucy, which is ok with me but once it was devoured it was hard not to want to drink the sauce lol but I had self control this time. Other than though, which was my bad, it was perfect yet again! I know if you try this recipe it'll definitely become a favorite of yours, like it is mine. 


___________________________________


For 2 servings I used:
~1/2 lb shrimp, peeled and deveined
3 C cooked pasta
1 T cooking oil
1/2 C of softened butter
1 C moscato (or other white wine)
Juice of one lemon
1 T garlic
1 T Italian seasoning
Salt, pepper, onion and garlic powder to taste
Parmesan cheese (optional)


Directions:
1. Cook your pasta according to package directions, drain off water, leave pasta in pot and set aside.


2. Heat a skillet over medium heat with 1 T of cooking oil


3. Cook shrimp in skillet until pink then remove to a plate and place skillet back on stove. Add garlic to skillet and cook until fragrant, about 2 minutes.


4. Pour wine and lemon juice into skillet and cook until liquid is reduced by half.


5. Add Italian seasoning, pepper, garlic and onion powder and mix. Turn stove down to low heat.


6. Add softened butter to sauce and let it melt. Put shrimp back into sauce and heat throughout over low for a minute.


7. Pour shrimp scampi into pot with pasta and stir. Sprinkle with Parmesan cheese if desired


Saturday, May 17, 2014

Mandarin Orange Glazed Tilapia


You ever get soooo hungry you just start throwing stuff in a pot and hope it comes out good? Well that's how this recipe came about. I was going for something Asian inspired as I'm a lover of most all Asian cuisine (as well just about every other cuisine lol but I've been in an asain mood as of late). Since I had recently done the ginger soy glaze I was searching for something similar but sweeter and remembered I had a jar of mandarin oranges I got from Wally World for all of $1 so I figured why not? 

I'm really not a "cookbook chef" or any type of chef for that matter but I like to get creative in the kitchen and when I do I never measure anything! So I'm going to give rough estimates of what I think I used for this sauce. Luckily I was forward-thinking enough to jot down everything I put in the sauce, just not how much. I know that the base is mostly mandarin juice and roughly equal amounts of soy sauce and rice wine vinegar with some honey or brown sugar (whatever you have) to sweeten to your liking. 

As for the sides I've been on a brown rice kick for a while because I just like rice and decided to replace my beloved white rice with something healthier, so brown it is...for now. But I'm always down to try new food and have been hearing so much about quinoa (not pronounced qui-no-a, like I thought but keen-wa, boujie) plus my mom (who is like my health guru and is also who told me the proper way to pronounce it after laughing at my attempt) been on it, so I decided to get a brown rice/quinoa mix from walmart to slowly introduce myself to it. I believe it was olive oil and rosemary blend or something...wish I would've took a pic of the box but it's not hard to find in the rice aisle. This was also my first time cooking with fresh green beans so I was really hoping everything came out good and it did and was awesome. I impressed myself with this one! But let me stop blabbing and get to the good stuff!!

For the glaze:
*this estimate is so you can make the general base and add more of whatever to get the taste, it's a sweet glaze with a twing of sour*
1/3 cup mandarin orange juice/syrup
1/4 cup soy sauce
1/4 cup rice wine vinegar (you can use apple cider or white vinegar but it'll taste a little different)
2 T honey or brown sugar 
1 T garlic
1 T melted butter
1 t grated ginger (optional, I just had a piece left in the fridge so I threw it in)

Everything else:
4 tilapia filets (or any other white meat)
1/4 cup mandarin orange segments
2 cups cooked rice or quinoa
2 cups fresh green beans
2 T cooking oil
Half a lemon (optional)
Salt and pepper (or good ol Tony's)

Directions:
1. Make your rice, quinoa or blend of both first since brown rice takes some time to cook

2. Whisk together all the glaze ingredients and adjust to your liking if necessary

3. Place fish in a baking dish and pour glaze sauce over it plus 1 T cooking oil. Bake at 400 for about 10 minutes or so, it will be white and flake easily when done

4. While your fish is baking go ahead and rinse your beans and cut off the tips. Coat them with the other T of cooking oil plus salt and pepper or other seasoning and sauté them until tender. I like a bit of crunch in mine but cook to your liking

5. When your fish is done, remove them to a plate, pour off glaze into a skillet, toss in mandarin orange segments and cook until it thickens. You can leave the oranges whole but I chopped mine up a bit to get more orangey flavor. You can also add flour or cornstarch to the sauce to speed up the process 

6. Plate your rice and beans, put one or two pieces of fish on a plate and drizzle glaze over fish and rice (if you want). Squeeze lemon over green beans and voila! Feast!!!

I hope I wasn't too confusing, I always feel like I'm rambling when trying to explain my cooking methods lol. Also all of my recipes are pretty flexible when it comes to main meats, so don't skip over something just because you don't have what I did, sauces are not picky they love all meats. Til next time, bon apetit! =)

Friday, May 16, 2014

Gardening in small spaces


So about a month and a half ago I decided I wanted to start a garden. My mom has a garden so I was already pretty familiar with how to get started. First I decided what I wanted to grow and where I would grow it, this was my first dilemma. I live on the top floor in a duplex  apartment with limited space for a garden. Since I only rent here I didn't know if I could use the backyard, which is also used for parking sometimes, for my plants so I decided to do a container garden on my "porch". I put that in quotations because I'm not sure if it can truly be called a porch, it's just a staircase with an extended top step...if that makes sense. But anyway, once I had an idea for how this could work I went out and got my supplies!

I started with snap pea and carrot seeds and potting soil from dollar tree. I also got a few planters from there, I like to be as thrifty as possible when starting new projects =). Next I went to Home Depot, who had their herb, fruit and veggie plants on sale 5 for $10, so I picked up 2 strawberry plants, 2 pepper plants (sweet red and orange) and a cilantro plant as well as some plant food and gloves just because I wanted to feel official (and not mess up my nails lol). For my other planters, I used two milks jugs, the bottom half of a 2 L soda bottle and my mom, who generously donated 5 garlic plants to my garden, supplied the last planter.

So far things had been going smoothly until this past weekend. I was in Atlanta and my poor plants all but died in the Savannah sun! My once almost too bountiful cilantro plant was knocked over and sizzled to a crisp against the metal staircase =(, the pepper plants' leaves were horribly wilted and one strawberry plant gave up on life. Thankfully all was not lost because I've nursed them all, save the cilantro, back to health since and my garlic and snap peas didn't suffer much. There are no before pictures but this is what I'm working with now.


This is my red sweet pepper plant that has two peppers coming in and I'm sooooo excited! I buy TONS of peppers, almost every week, which is why I wanted to grow my own, I know I'll save money because they are not cheap!


Here's my orange bell pepper plant, which only has one fruit but I'm hopeful for more, it was wilted so bad that the top half of it had to be cut so I'll be watching it carefully.


My garlic has been prospering since I brought them home from my mom's. Also if you look closely you can see how pitiful my cilantro looks now, it's the between the garlic and strawberry plants.The strawberry plants have produced maybe 3 or 4 fruit but the were all pretty tiny, like no bigger than the top half of my thumb, so I'm thinking of planting them in something with a little more room soon.


And last are my snap peas which have been sprouting up like crazy but no fruit yet. I'm not sure what their flowers, if they have any, look like but so far it's been all green. I've read they get up to 6 ft so I may have get bigger sticks soon to keep them upright.

And a group picture plus my "porch" =)

**from top left, clockwise: snap peas, starwberries, cilantro (in recovery), garlic, (newly planted) flowers, red pepper, orange pepper**

So that's what I have so far, I'm happy to see my plants recovering and bearing fruit! When my cilantro bounces back, I'll be sure to do an update post. But I just wanted to show you that growing a garden doesn't have to be hard and you don't need a lot of space (or money) to get started! Plus it's fun! It teaches me paitience and persistence, which I definitely need in my life. I'm no expert so I'm always open for suggestions/comments or questions. Hopefully I inspire someone to try their hand at growing something. ✌️

Monday, May 12, 2014

Cilantro-Lime Chicken


Boneless, skinless chicken breasts are one of my favorite meats to cook with because it is so versatile and doesn't take long to cook. When I buy them, I always wrap them individually in plastic wrap and toss them in the freezer for quick and easy defrosting when I need one. It's perfect for me because I only use one breast when making any given dish. 


Now about this recipe, I actually found the marinade for the chicken via google and the rice recipe on a food forum. The original recipe was for a cold rice salad (with white rice) but for my meal I wanted hot rice so I threw it in a skillet and added Parmesan because what isn't better with cheese? Now the cheese is totally optional so feel free to leave it out if you want. I also used my own homemade salsa which helps out with the calories, even though store bought salsa isn't too bad calorie-wise. The avocados were only added because the first time I made this I had half of one in the fridge that I needed to get rid of so I chopped it up and tossed it on the plate.

This has become one of my favorite (and quickest) meals to make during the week that I never get tired of it, so here's my Frankenstein recipe that I hope you'll add to your meal rotation....

For the chicken:
1 boneless skinless chicken breast (cut in half)
1 T cooking oil
Seasoning (I use Tony's)
1/4 cup shredded mozzarella
1/4 cup salsa
1/2 avocado in chunks
Chopped cilantro for garnish (optional)

For the marinade:
Juice of one lime
1 T oil (I use olive or canola)
~1 T cilantro (I use fresh but I'm sure dried will do, I also use more than 1 T but only bc I reallyyyyy like cilantro)

For the rice:
2 cups cold rice (I used brown)
 *all these I add to taste: chopped cilantro, hot pepper sauce or vinegar, Parmesan (optional) and a little Tony's (or salt and pepper) -- if you're unsure, you can start with 1 T of everything except the seasoning (do maybe 1/4 t) and adjust to your liking

Directions:


1. Whisk ingredients for marinade together in a bowl and marinate chicken for three minutes (that's literally all it takes, you can do longer if you want)


2. Heat a skillet over med-high heat, pour in cooking oil and when oil is hot add chicken while the chicken is in the skillet sprinkle seasoning on one side then when you flip it season that side as well


3. Brown chicken on both sides and cook through. When chicken is done set aside on a plate and top with mozzarella, the heat from the chicken will melt it


4. Over med heat, add cold rice to the skillet and stir in oil, vinegar, cilantro and seasoning; heat throughout


5. When rice is done divide it evenly between two plates and place a piece of chicken on each rice bed then top with salsa. Chop avocados and scatter evenly on plates then garnish with additional cilantro and/or Parmesan if desired.

And that's it, simple enough eh? If you're wanting a bit more substance, you can add black beans (or your favorite beans) to your rice mixture without adding much more calories, tweak it to your tastes. I do that with just about every recipe I try, mostly because I'm always combining recipes! But anywho, I hope if you try this one you'll love it as much as I do! Eating healthy doesn't mean eating bland and the best way to continue eating healthy is to make awesome, flavorful healthy dishes! Til next time... =)